The Complete Guide to Adding a Professional Timer to OBS Studio
Looking for a reliable OBS timer overlay? Learn how to integrate StageClock into your OBS scenes for a seamless, professional live production.
Table of Contents
If you are a live streamer, you know the struggle of adding a timer to your broadcast. Most OBS timers are either "clunky" plugins that break with every update, or simple window captures that look messy and pixelated.
StageClock is a native browser-based solution, meaning it’s as stable as the web itself. Here is how you can set it up in under 60 seconds.
Why StageClock is the Best OBS Timer
- No Installation Required: Just a URL.
- Transparent Background: Blends perfectly with your stream graphics.
- Remote Control: Start/Stop the timer from your phone without minimizing OBS.
- Segmented Timing: Automatically move through your show's agenda.
Step-by-Step OBS Integration
1. Generate Your Display Link
Open your StageClock dashboard and create a new event. Click on the Display Link and copy the URL.
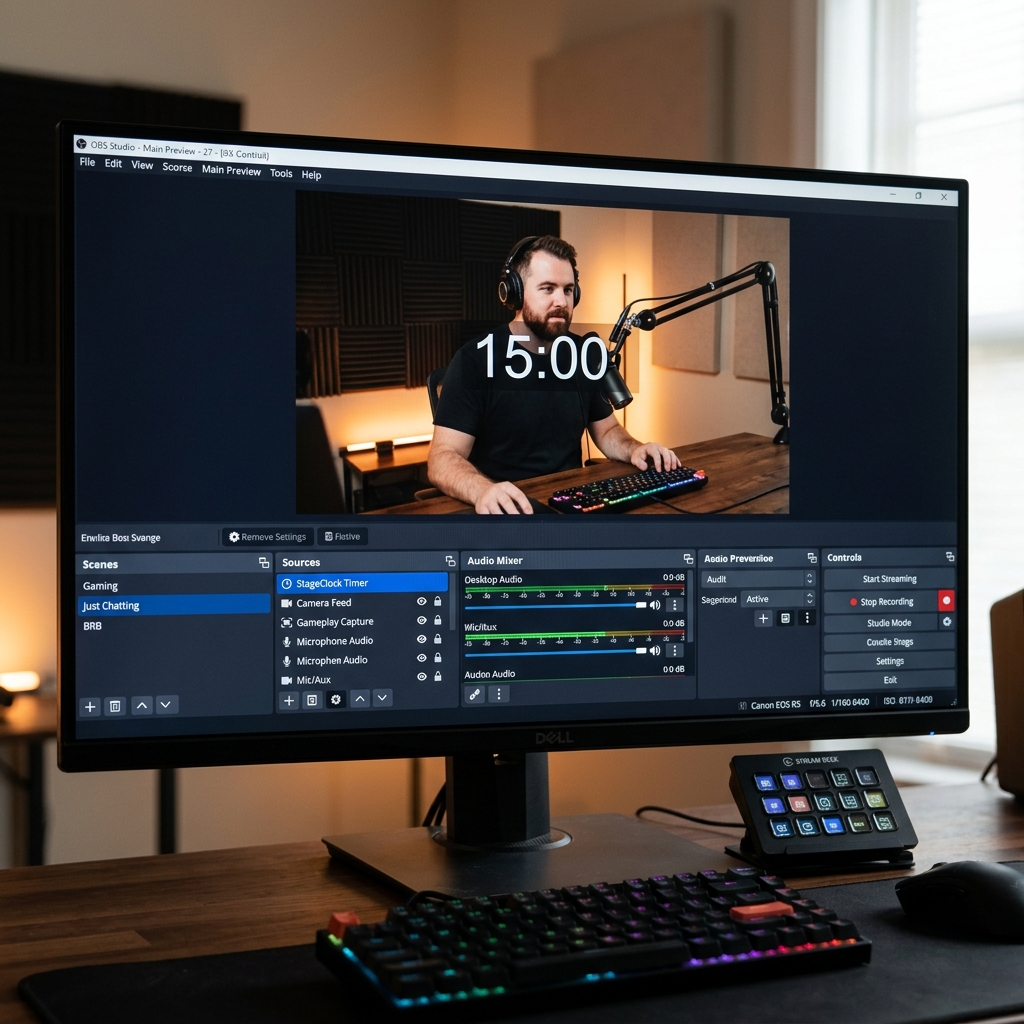
2. Add a Browser Source in OBS
In your OBS Scene, go to the Sources panel, click the + icon, and select Browser.
- Name: "StageClock Timer"
- URL: Paste your Display Link here.
- Width/Height: We recommend 1920x1080 for high resolution, then scale it down in your scene.
3. Enable Transparency
To make the timer look like a professional overlay, go to the StageClock settings and toggle Transparent Background. In OBS, the timer will now float over your video feed without a solid box around it.
4. Custom CSS (Optional)
If you want to match the font or color perfectly to your brand, you can add Custom CSS directly in the OBS Browser Source properties.
Pro Tip: Scene Switching
You can add the same StageClock browser source to multiple scenes (e.g., "Just Chatting" and "Gameplay"). Since it’s the same source, the timer will continue running perfectly as you switch between scenes. No more resetting your timer manually!
Want to try it yourself? Launch your first OBS timer with StageClock.